STACKING ROCKS IN YOUR AQUARIUM

Updated
Learn how well stacked rocks can add personality and a natural look to your aquarium.
For many aquarium hobbyists, one of the most exciting parts of owning a tank is decorating it. Some hobbyists go all out with novelty decorations like sunken pirate ships and chests of gold. Others, however, choose to cultivate a more natural décor scheme. One of the ways you can add personality and a natural look to your aquarium is by the addition of rocks. However, when you use rocks in your aquarium to forms caves or piles, you are mixing two things that traditionally do not mesh well: rocks and glass. Therefore, it is very important that you follow several rules when adding rocks to your aquarium so that you do not come home one day to shattered glass and water covering your floor.
Why Would I Want Rocks in My Tank?
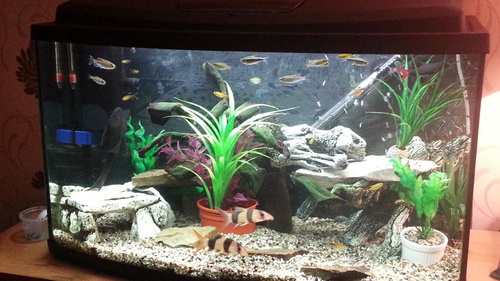
There are many reasons why rocks make good additions to the home aquarium. For one thing, they can greatly enhance the aesthetics of your tank. Imagine your aquarium with a bare bottom and nothing to break up the view – you can probably see how that would get a little bit boring for both you and your fish. Adding rocks to the aquarium can help to fill some of that empty space while also giving your fish places to hide. A cave built from rocks makes a beautiful and natural décor element in the aquarium and it will also help your fish to feel safer and more secure in their home environment.

Rocks are also useful for some natural reasons. For example, many African cichlids eat algae off rocks so supplying them with a nice bunch of rocks better simulates their natural environment and behaviors. Rocks can also serve to break up aggression by giving each fish their own territory to defend (so they are not defending the entire tank). This is particularly important if you have a community tank or a tank where you plan to house more than one male of a certain species.
Okay, I’ll Put Some Rocks In, But How Do I Stack Them?
Before you actually move on to stacking the rocks in your aquarium, you need to think about what type of rock you want to use. There are many different options to choose from including smooth river rocks, porous lava rock, flat slate and other options. You also have to think about the size of the rocks you use – will they stand alone as individual décor elements or will you use them to build caves for your fish?
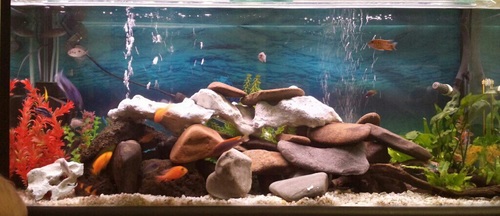
The way you are able to stack rocks in your tank will largely be determined by the type of rock. If your rocks are smooth, then you will have one of two options. Your first option is to make your stack very short, almost forming a small rubble pile. This option serves primarily as decoration in the tank because the spaces between the rocks will not be large enough for fish to hide.
Your second option is to use silicone to glue the pieces together. Be aware, though, that once you glue them together, they are stuck that way. Some species (such as mbuna cichlids) require you to change the rock work around from time to time in order to break up territories. This is not possible when you glue the rocks together. You might also get bored of the same look day after day. One of the great things about rocks is the ability to make your tank look completely different with each restructuring of your rocks. This is not possible when you glue them together.

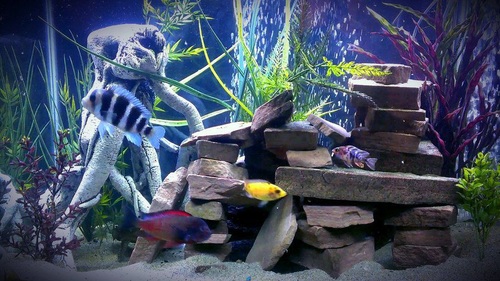
Now, if you have jagged rocks, such as lace rock, then your stacking becomes much easier. Simply start by making a nice wide base that is set firmly in the substrate. Then add rocks in layers, making sure that each rock is very stable (remember, fish can bump into them and knock them over). I usually try a rock at a certain location and then push on it in all directions. If it shifts then I move it somewhere else. It takes some time, but it is well worth it in the end as the result is a very stable wall. The jagged edges allow you to fit everything together like a puzzle.
As you build your way up, you want to taper the rocks so that the stack is narrower at the top and does not lean against the back glass. You also want to make sure you match the size of the caves formed in the rocks to the size of your fish. You generally want them to be able to swim in between the rocks to give that natural feel, but if the spaces are too large or too small, the fish will avoid them.
How Do I Make Sure They Don’t Break the Glass?
There are three main ways to make sure your rocks do not break your glass.
- Don’t add too much weight – Remember that you cannot just keep stacking and expect your aquarium to hold it. There are limits to everything. I tend to use about double the weight of rock as gallons of water in my tank (so for example, in a 55 gallon tank I use 110 lbs of rock). This is just a general rule for me because it usually provides me with more than enough rock to make large stacks and I have never had a problem with this much weight on my glass.
- Don’t make pressure points – You don’t want a tip of rock resting on your glass, especially if that rock has rocks on top of it applying even more pressure. Every time you have points against the glass, there is a chance that the glass will break from the pressure. In general, you don’t want your rock leaning against your glass walls. Instead, stack the way I showed you above. This is the safest method. You also need to make sure there is a layer of substrate between the bottom glass and your rock. Sometimes, you can push on the bottom layer so much that you end up moving all of the substrate out of the way and the rock has points that then hit the bottom glass. This is obviously bad. If you are going to have a good deal of rocks in your aquarium then you will need a thicker layer of substrate to disperse the weight.
- Make sure your rocks are stable – Remember that fish can dig out substrate and bump into rocks all the time. Therefore, you need to ensure that they are not going to dig out the area under your rocks and that the caves are so secure that they will not fall when bumped in to.
If you are really worried about the weight of the rocks then you can always buy egg crate at your local hardware store and place this under your substrate. It helps to disperse the weight, but can be a pain when it comes to deep substrate vacuuming.
What Kind of Maintenance is Required?
Rocks do add to your cleanup time, especially if you have a lot of them. The presence of rocks in your tank may also make it more difficult to catch your fish -- this usually means you need to take all or some of the rocks out to catch your fish. Another thing to consider is the fact that uneaten food and waste can get caught in the cracks between rocks and it will also accumulate in the substrate beneath them. Every month or two, you need to take all of the rocks out and vacuum the substrate where they were. These kinds of maintenance tasks are necessary regardless how you decorate your tank, however, so you shouldn’t let the fact that you might need to do a little work keep you from using rocks as decorations in your aquarium.

Other Tips and Tricks
If you want to use rocks to decorate your tank but don’t want your tank to look too cluttered, be careful in choosing your rocks. Rather than creating a large pile, consider stacking one or two larger rocks in certain areas of the tank. Try to avoid leaning any rocks up against the tank glass and don’t use any that will take up too much of the free space in your tank – you don’t want to limit the free-swimming abilities of your fish. To further enhance the natural appearance of your tank, work some live plants in and among the rocks in your tank.
Conclusion
The way you decorate your aquarium is entirely your choice – only you can decide what look you want to cultivate in your tank and you are ultimately the only one who has to be pleased with its appearance. Though you can choose what type of rocks you want to use in your tank, keep the tips and techniques discussed in this article in mind as you decorate your tank in order to avoid problems. As you will see for yourself soon enough, adding rocks to your aquarium can significantly change and enhance the look of your tank – your fish will thank you!
comments powered by Disqus


